
My Recovery From Nail Damage
/Growing up I was always biting and picking my nails. The habit followed me throughout college, and I was always ashamed of how my fingers looked. When I finished grad school and began my first job as a physician assistant I knew I had to do something about it. I had to look like a professional. So for the last 4-5 years I went to a nail salon at least once a month for a gel or powder dip manicure. I maintained it not because it was something I enjoyed doing, but because it was the only way that I could get myself to stop biting my nails and picking the skin around my cuticles. Thankfully I could afford it. And since I paid for it, I was going to do my best to leave my fingers alone.
I wanted to free myself from being a slave to the nail salon. It was always something I dreaded. After a long day at work, the last thing I wanted to do was go get my nails done. With 3 different moves in the last few years I didn’t have a go-to salon. So I would pick places based off of convenience and affordability. At each salon they would soak my nails in acetone and then use a drill to remove the softened residual polish (hello damaged nails). This was the only 2-3 minutes out of the month that my poor nails got a chance to breathe. Or what was left of them, I should say! They were so soft that I could fold them, and they were discolored.
As much as that bothered me, I felt like I didn’t have any other option. In the past I had tried taking care of my nails on my own but I always failed. I couldn’t manage my thick “cuticles” (eponychium is actually the correct term). I couldn’t get a nice shape with my nail clipper and emery board file. I had no patience to paint my nails, and I never did a good job when I did. My nails would break because they were weak and thin. The list of excuses goes on and on!
Then I began planning my wedding. I became more frugal with money, but I wasn’t going to give up my nail maintenance just yet. I knew that I wanted to free myself from being a slave to the nail salon, but I decided it would have to wait until after the wedding. I couldn’t risk having ratchet fingers and nails on my wedding day! And when nerves kick in, the biting and picking are in full swing.
Now it’s been about 4 months since I had my powder removed and I never went back. In addition to taking a biotin supplement, here’s what made all the difference for me:
1) I used Nailtiques formula 2 nail hardening polish. Not the best thing to use to strengthen your nails in the long run, but I needed something that would work quickly so that my nails weren’t too brittle during that transition stage. Let me tell you - it works! I used it for about 3 months and my nails are stronger than ever. I discontinued it because one of the main strengthening ingredients is formaldehyde resin, which can make your nails even more brittle and more prone to peeling with long term use.

2) So now I am using oils to keep my nails strong and healthy, and to moisturize my cuticles. I use jojoba oil at least twice a day. I even carry a little portable oil brush for when I’m on the go. I especially like to use this one when I’m at work - I apply it after I wash my hands (which is a lot).
3) Beside the oil, my favorite moisturizer is Amlactin. It contains 12% lactic acid which gently exfoliates and boosts healthy skin renewal. Plus it’s incredibly moisturizing! I use this when my cuticles are extra dry, but not too frequently because ultimately it can soften the nails.
4) I honestly think the most important thing that I’ve done in this healthy nail journey was purchasing a glass nail file. I did a lot of research on the web and everyone raved about these glass files so I had to try it out. The difference is incredible! While the emery board always left my nails frayed and rough, this one leaves my nails perfectly smooth. And it works better. So much better that there’s really need to use a nail clipper! I have so much control over the shape of my nails now, whereas before, if I had a bad cut with the clipper I just had to do the best I could with the file to fix the damage. If you want to step up your at home manicure game, this is it!
5) I invested in a high quality nail base and top coat. I went with Essie. Essie is considered “4-free” meaning it contains very few “toxic” ingredients. Learn more about these designated nail polish numbers here. I haven’t found a holy grail brand of nail polish yet, but I can say I’ve gotten a lot better at painting my nails with patience and practice.
6) What about those horrible thick cuticles? Well, after I get out of the shower and they’ve softened, I gently push them back with a push tool. As long as I keep moisturizing them often, they’re not quite so bad.
That’s really it. I love the way my nails look and feel now. And I’m so happy with my new freedom! And my bank account is happy. And my husband is happy…
Here are some photos of my progress so far. I’ll start by showing you a nasty infection that I got from the nail salon when I was continually getting the powder dip. Yeah, gross. But you can really see how damaged my nails were. I had no choice but to keep polishing them because I couldn’t go to work like that. Luckily, the infection grew out.

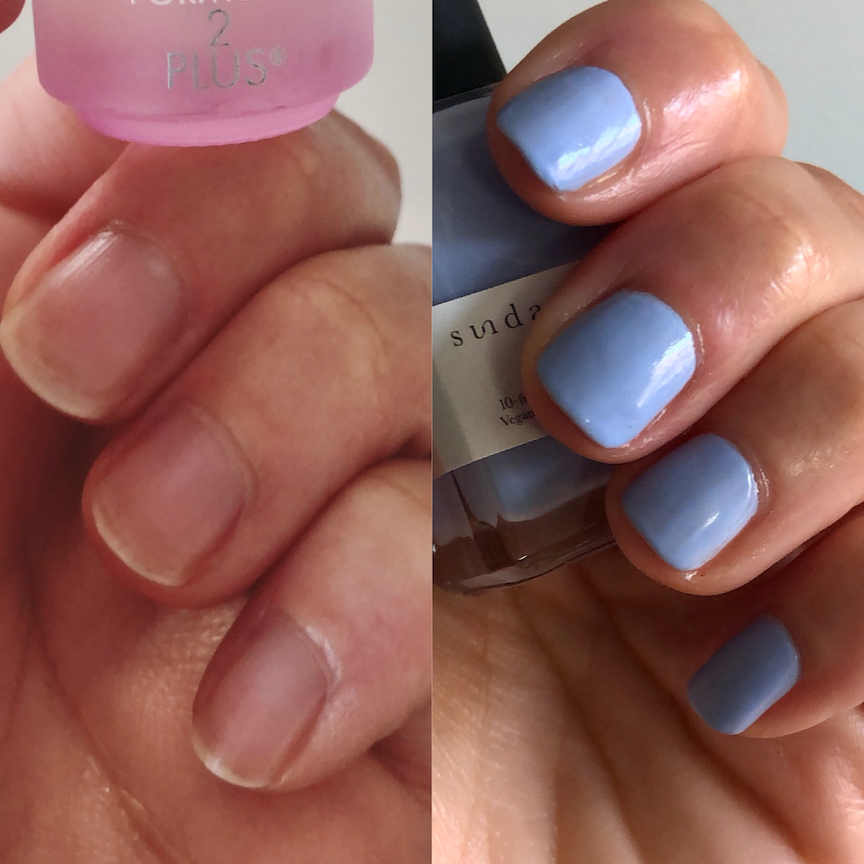
In the first two photos below you can literally see the line distinguishing where my damaged nail is growing out. In the last two photos my nails are the healthiest they’ve ever been. It’s still a work in progress (mainly kicking my bad habits), but having the right tools and seeing great progress has helped tremendously!

I hope this helps somebody in their journey to healthy nails! Let me know what’s helped you in the comments.